The idea of this tab is that you can arrange things before you are away. Imagine you have important tasks open, which shouldn’t be left behind and needs to be taken care of during your absence.
On the preparation tab you can add comments to those issues stating that you will be out of office, or directly reassign them to someone else. This can be done one by one or for all issues in bulk.
Upcoming absence notification
If your next planned absence is not more than 5 business days ahead, an info message is displayed on top of the page which reminds you to prepare for the upcoming absence.
With a click on “dismiss”, the message disappears and won’t be shown again.

Comment and assign your issues
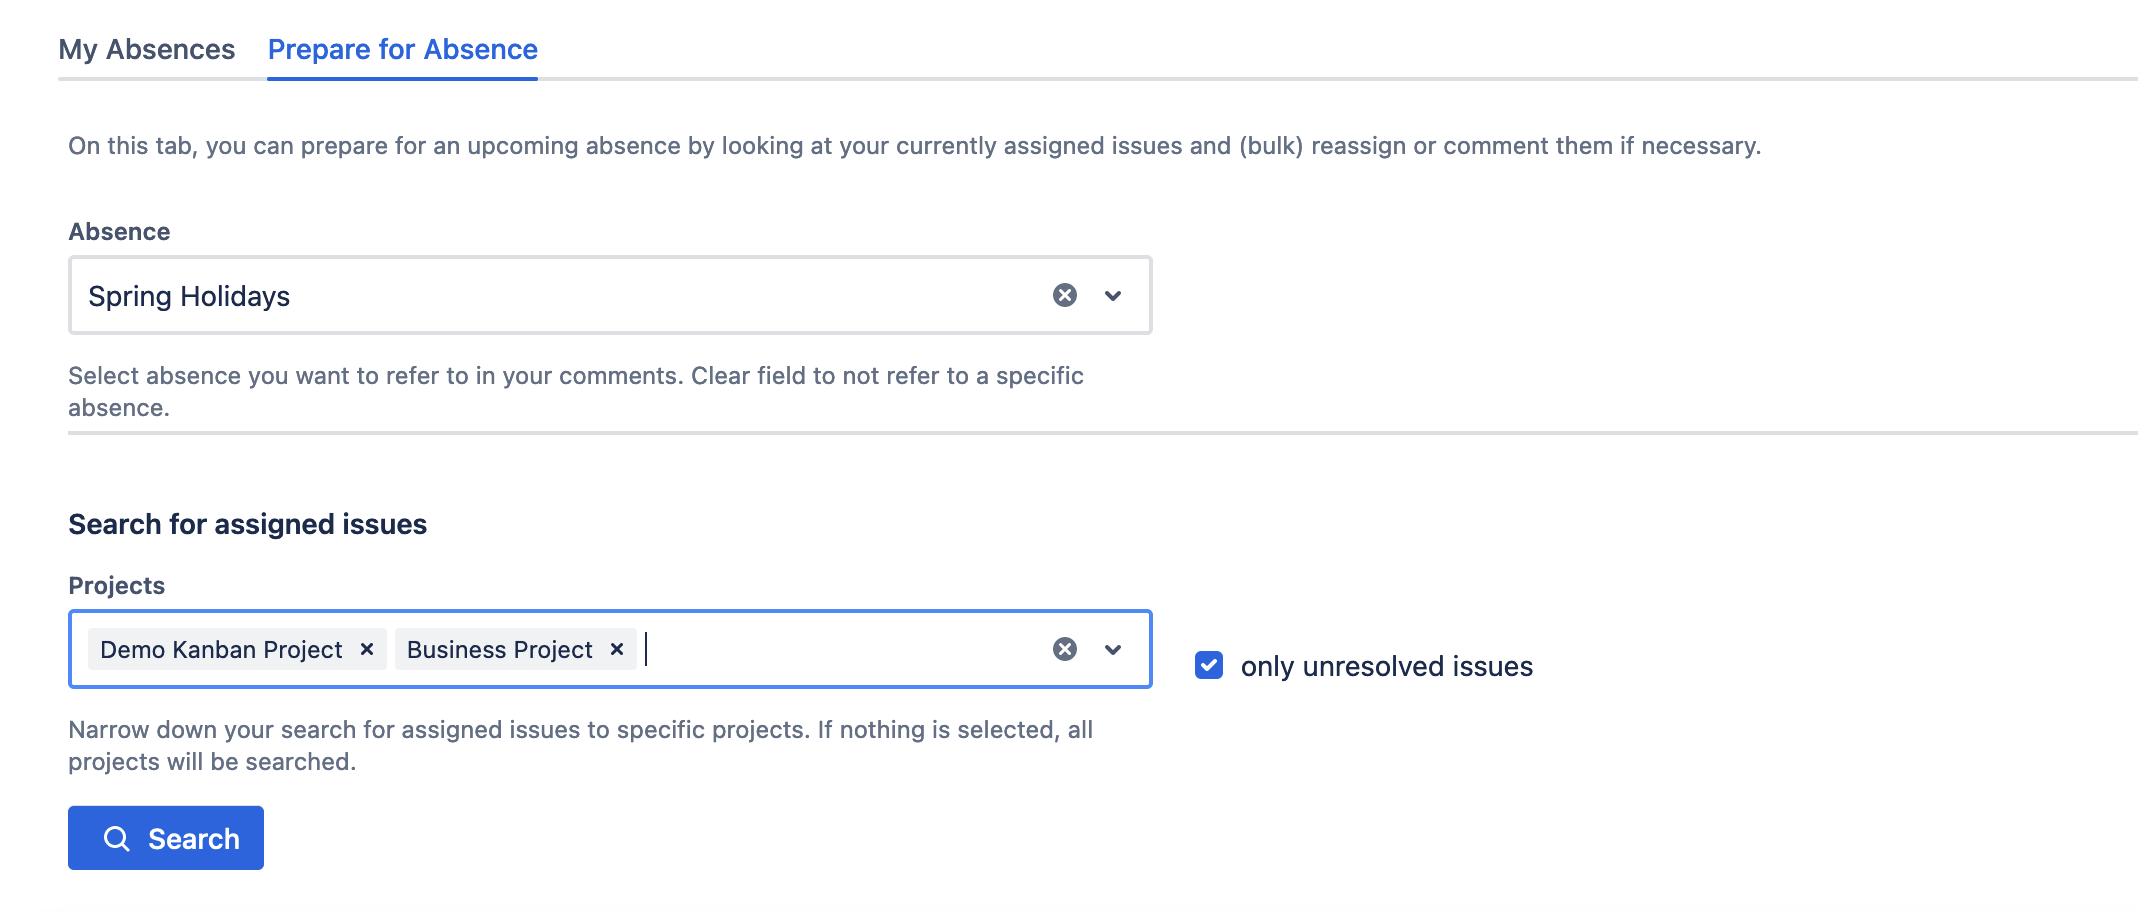
Reference absence
Before you search for assigned issues, you can select an absence to which you would like to refer to. By default, the next upcoming absence is selected. This absence entry is used to pre-fill comments with information on start and end of absence.
Search for assigned issues
By clicking on the search button, you can start the search for issues assigned to you. A JQL search is performed in the background to fetch a list of assigned issues from Jira. There are two possibilities to modify the search results:
-
Narrow down to specific projects: You can select one or several projects in the select field to only search in those projects. If you have a high number of issues assigned in Jira, a limitation to certain projects might be useful.
-
Only unresolved issues: This selection is set by default and we recommend to keep it like that. By default, only open issues will be searched. If you deselect this option, the number or returned issues might be very high and the search takes a lot longer.
In general, we limit the number of displayed issues in the table to 500 as commenting and assigning of more issues prior to your absence isn’t recommended.
Comment and assign
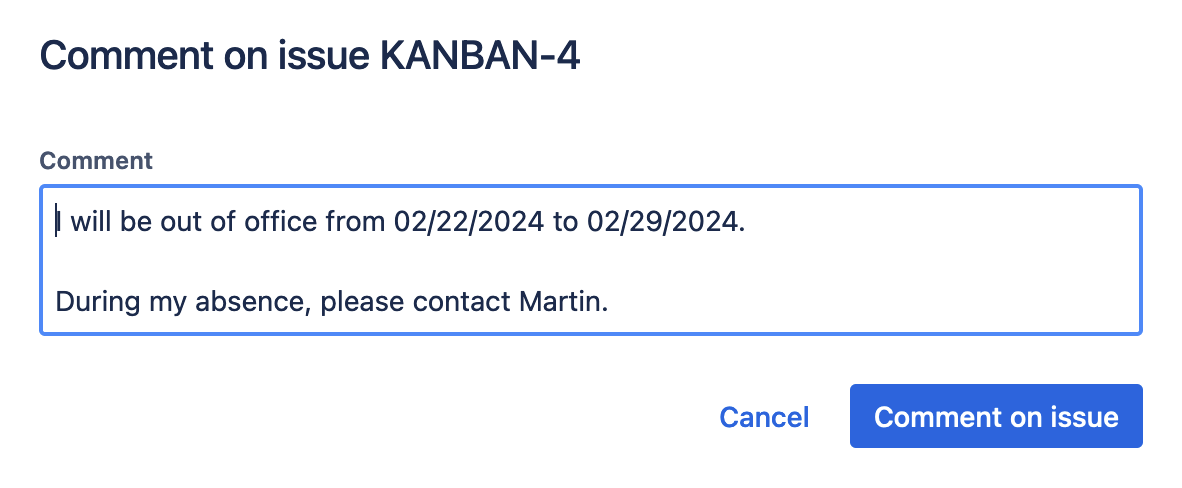
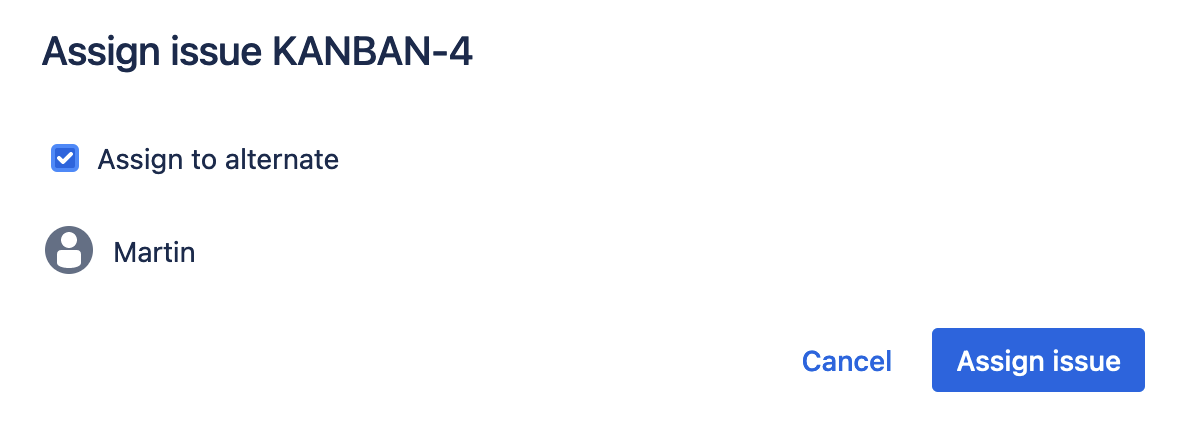
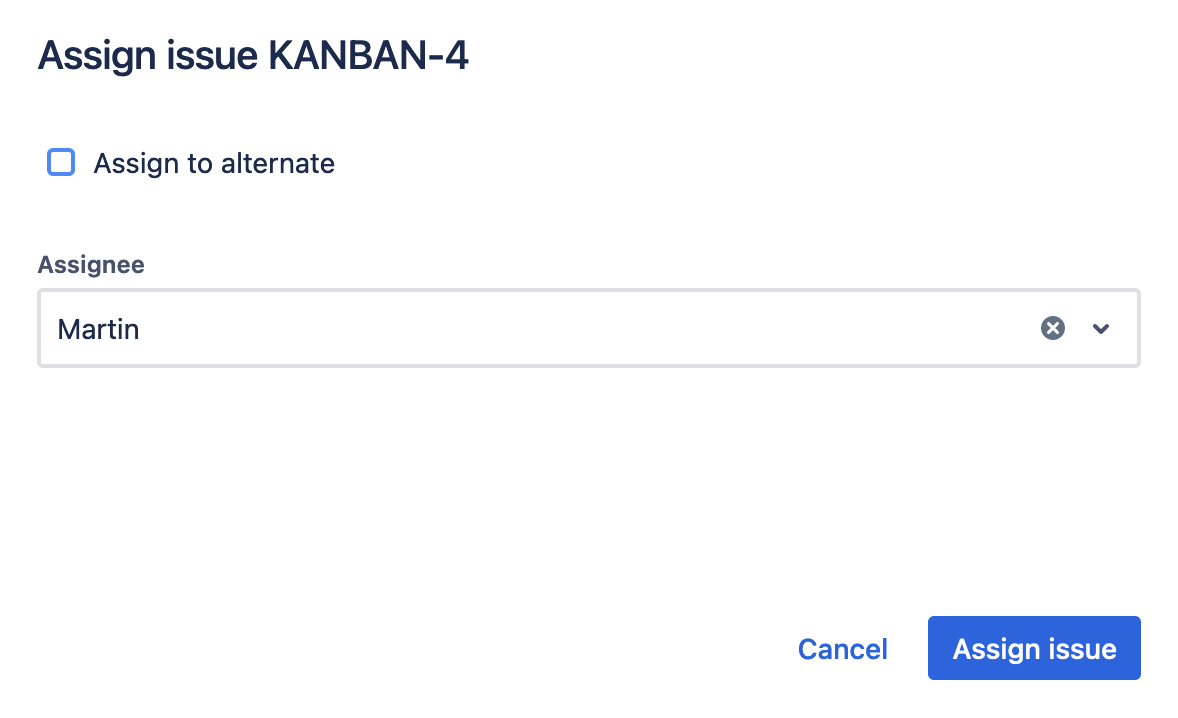
When the search is completed, a list of assigned issues is displayed. To comment on them or change the assignee, you have two options:
-
individually one by one
-
bulk action
For the individual actions, you can click on the comment or assign button in the respective issue row in the table. A dialog appears where you can either define the new assignee, or add a comment to the issue. If you have selected a references absence on top, the comment field will have a default value with information on this specific absence (start- and end date).
For assigning an issue, you have the option to either assign it to the defined alternate user. If you didn’t define an alternate user or want to assign certain issues to someone else, you can deselect that option and choose an assignee in the user field.
For bulk-commenting or -assigning of issues, you can define the settings on top of the table. If the table contains more than 1 issue, the bulk action options can be expanded.
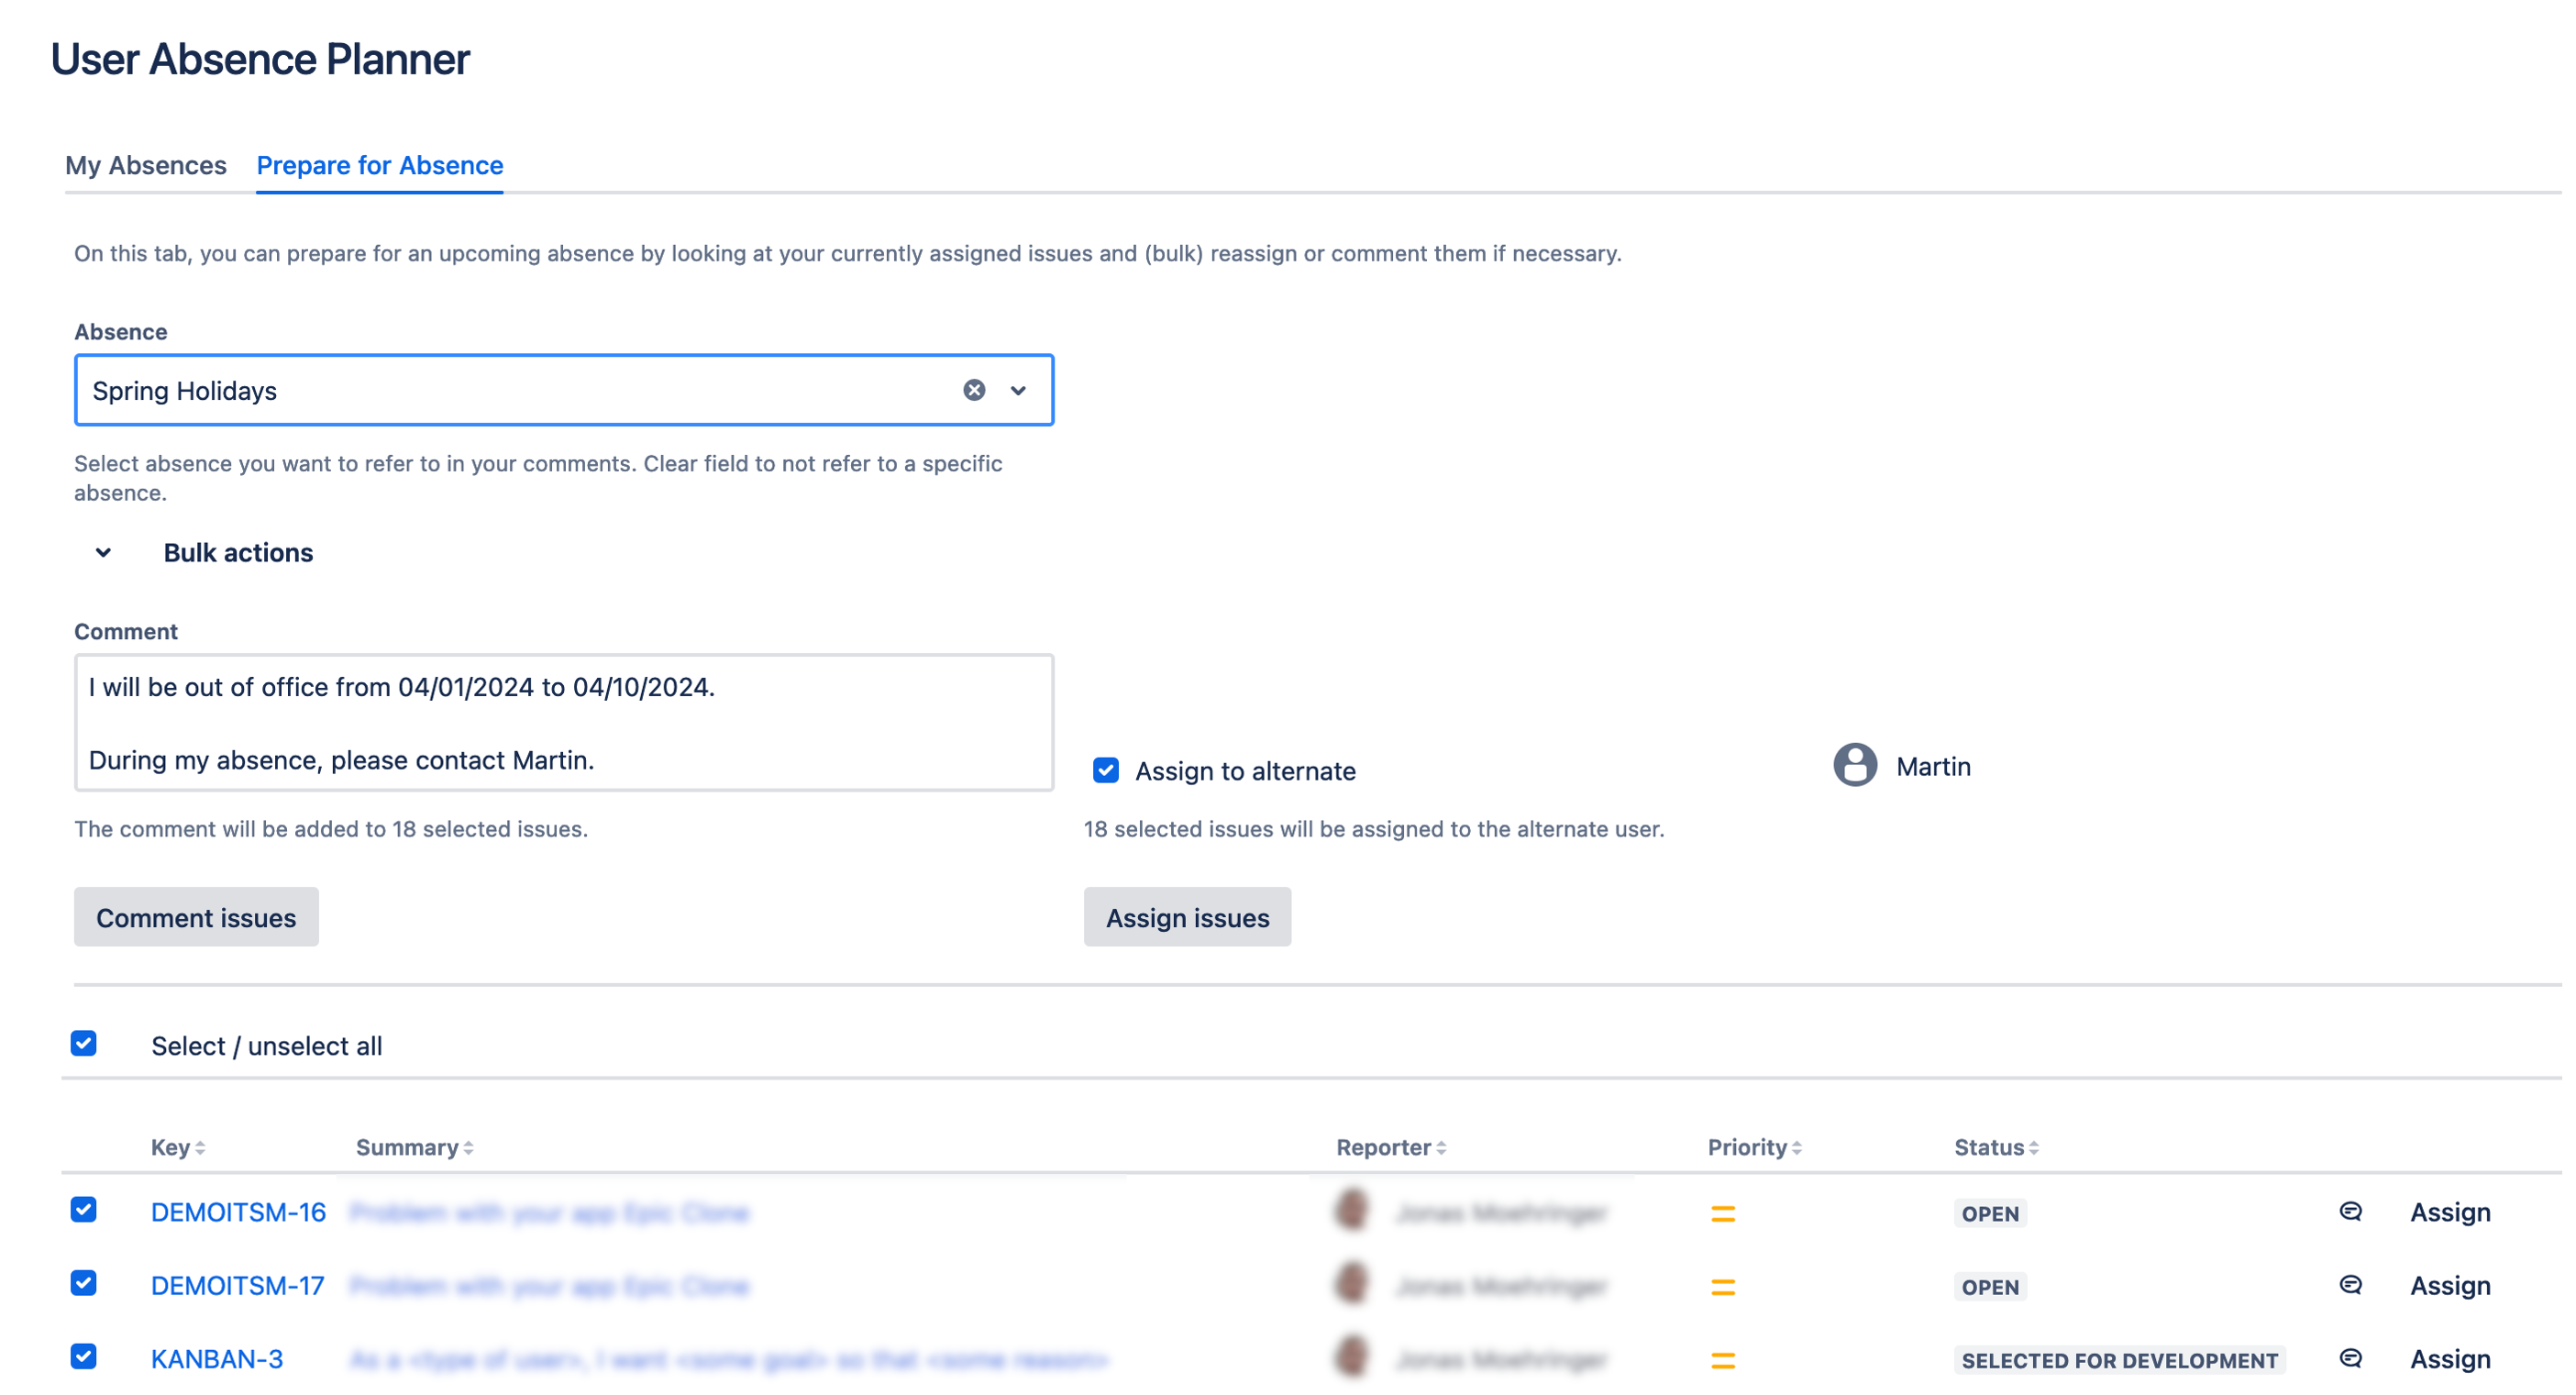
Similar to the options for the individual issues mentioned above, you can define a comment to be added to all issues and an assignee to be set on all issues. The number of modified issue depends on how many are checked in the table. By default, the checkbox in the first column is checked for all issues. You can decide individually for each issue, whether to include it in the bulk action or not.
Below the comment and assignee fields you see how many issues would be changed when you click on comment issues or assign issues, respectively.
When one of the buttons are clicked, a dialog appears where you have to confirm to submit the bulk action.
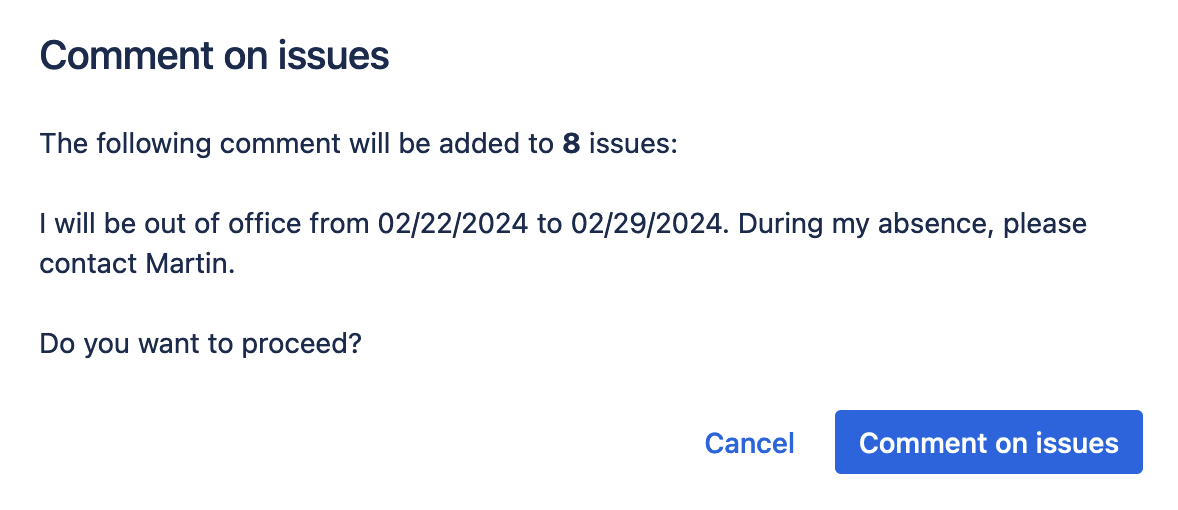
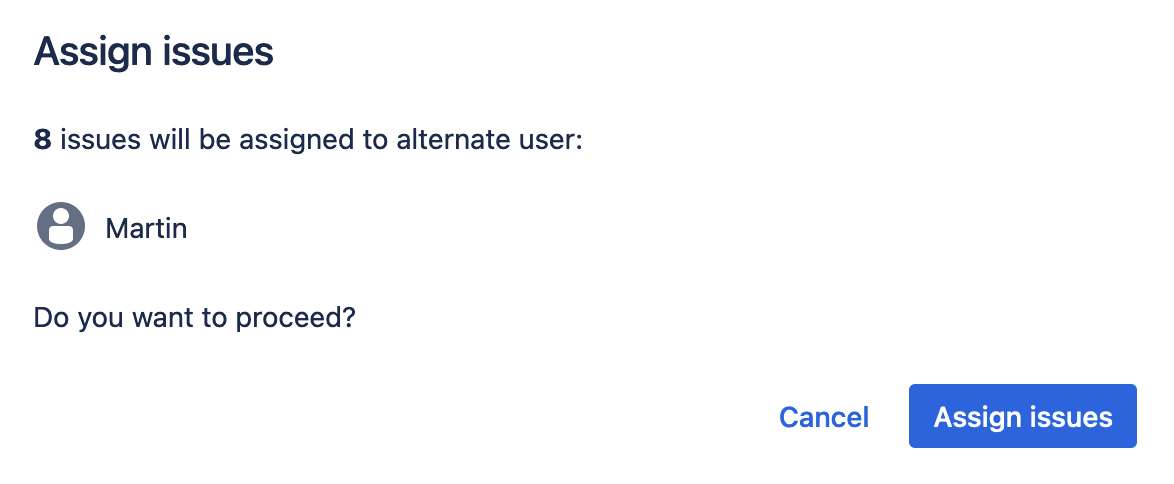
After submitting the dialog, the issues get commented or assigned. When that is done, the dialog shows a message with information on how many issues succeeded and how many failed.
Notes on permissions:
Your assigned issues might be located in various project. If you don’t have the assign issues or comment on issues permission in one of those projects, you won’t be able to comment or assign them. In that case, the individual action in the table won’t be available.
For the bulk action, the option will be available though. However, it will fail for those issues due to missing permissions.