How to access the User Absence Planner issue view?
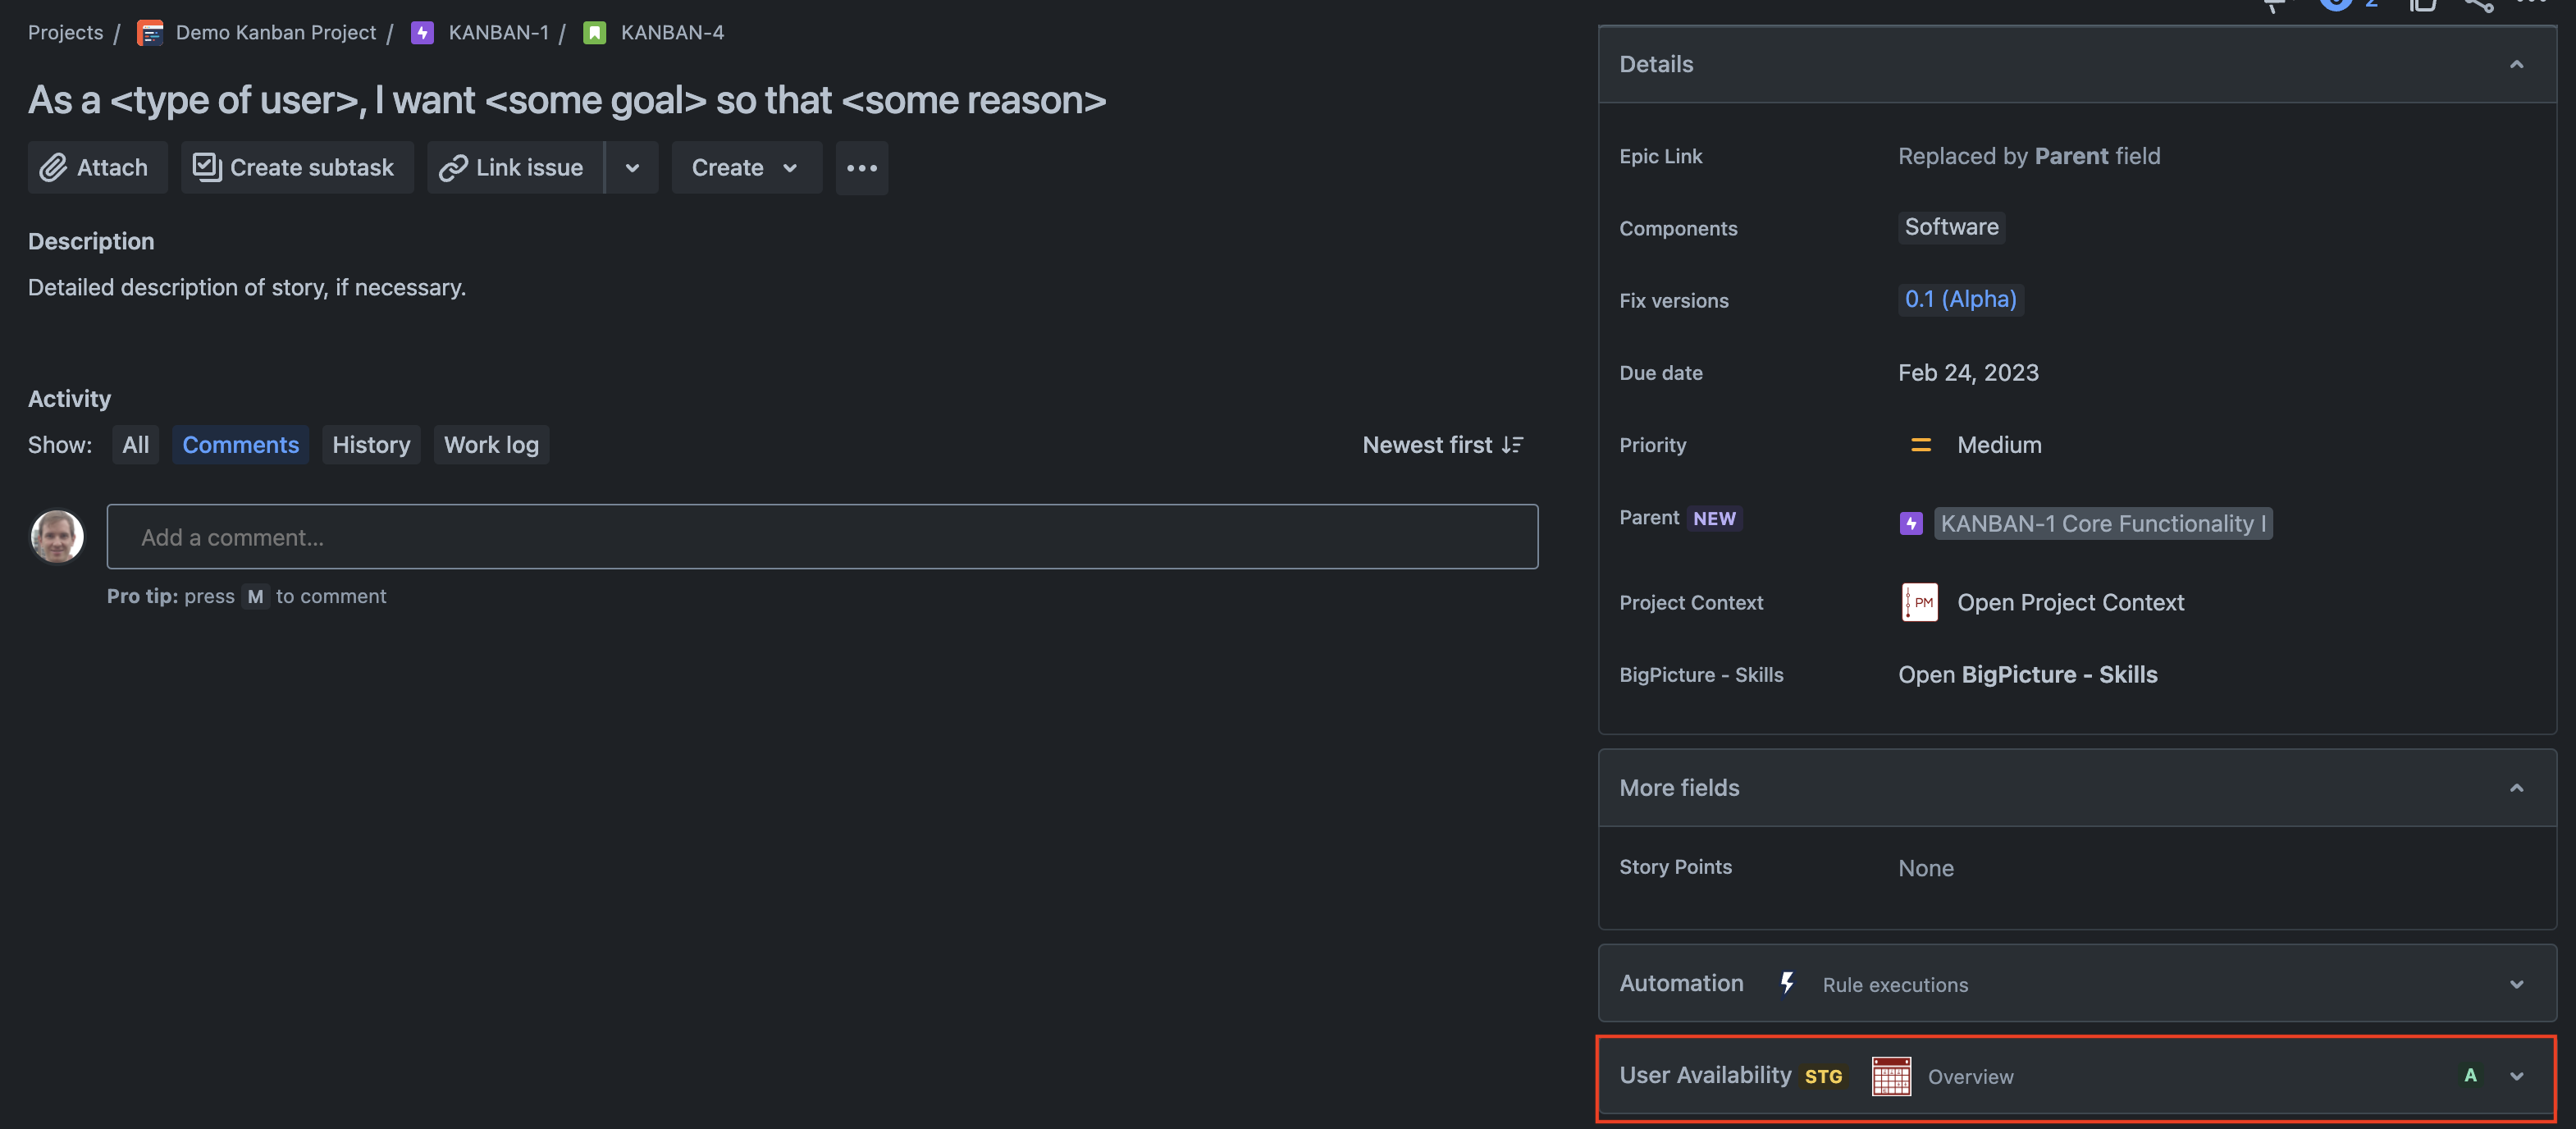
When opening an issue, the user absence planner information is displayed on the right sidebar in a separate section. You can see a summary of user availability for the current issue instantly:
-
A means that all users in relevant fields are currently available
-
O means that at least one user in relevant fields is currently out of office
-
no app access means that a system administrator has defined that you don’t have access to the absence planner app. You can ignore the app on issue view in that case.
By clicking on the expand icon on the sidebar, you can open a detailed overview for user availability. You don’t have to expand the overview each time you load the issue. After expanding it once, the information is saved for your user and it will be automatically opened on every issue reload until you collapse it.

What can you see in the Availability Overview?
Default view
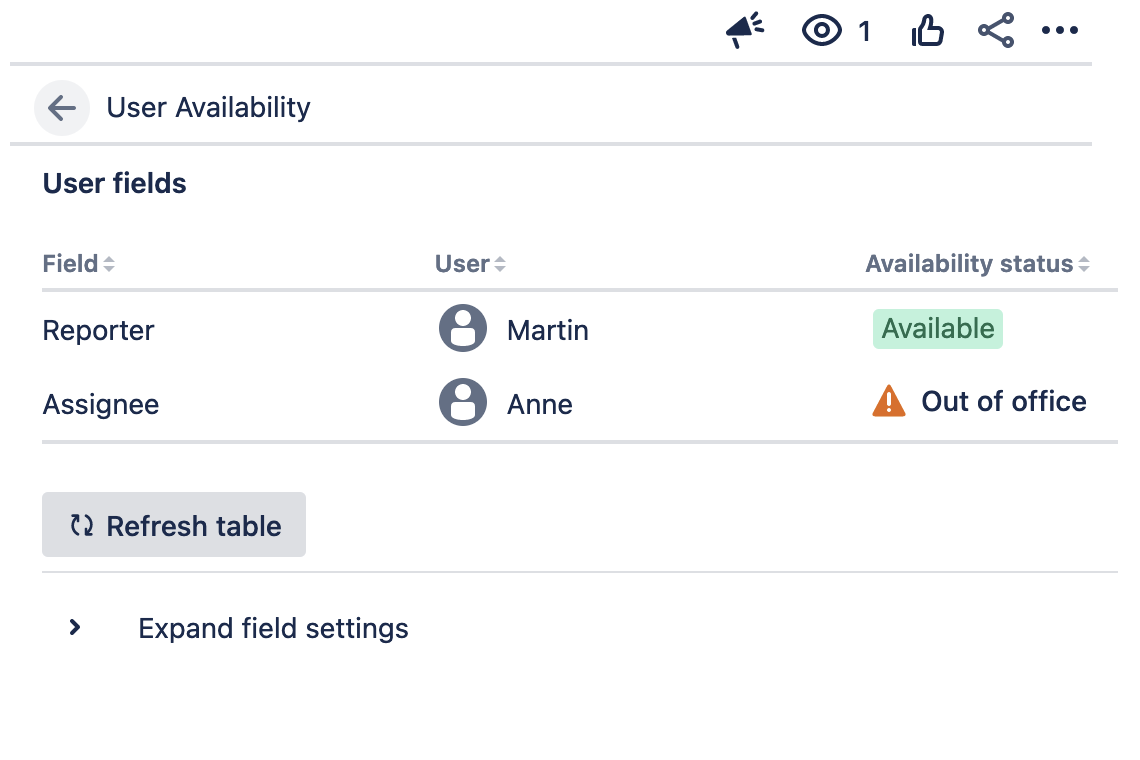
By default, the overview shows availability information for reporter and assignee field of the issue. That means, it shows whether the users in those fields are currently available or out of office.

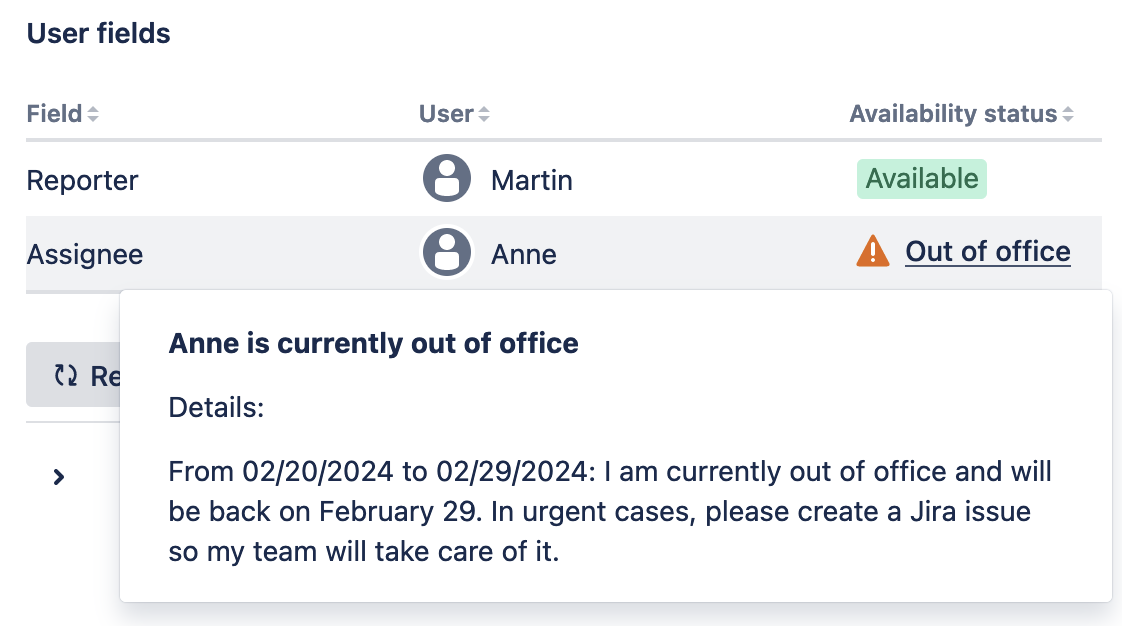
If a user is out of office, a respective icon is displayed in the availability status column. You can click on that icon to get more information about the absence (start and end dates, as well as absence message)

It might be the case that it has been set in the Jira administration that more fields should be displayed by default. Therefore, the default view might show more information in your instance.
The refresh button reloads the table and absence information in case the field values have been changed recently.
Please note that when you close this overview and open it again without a reload of the page, the table is not updated. Please use the refresh button in that case to get up to date data displayed.
Display more fields
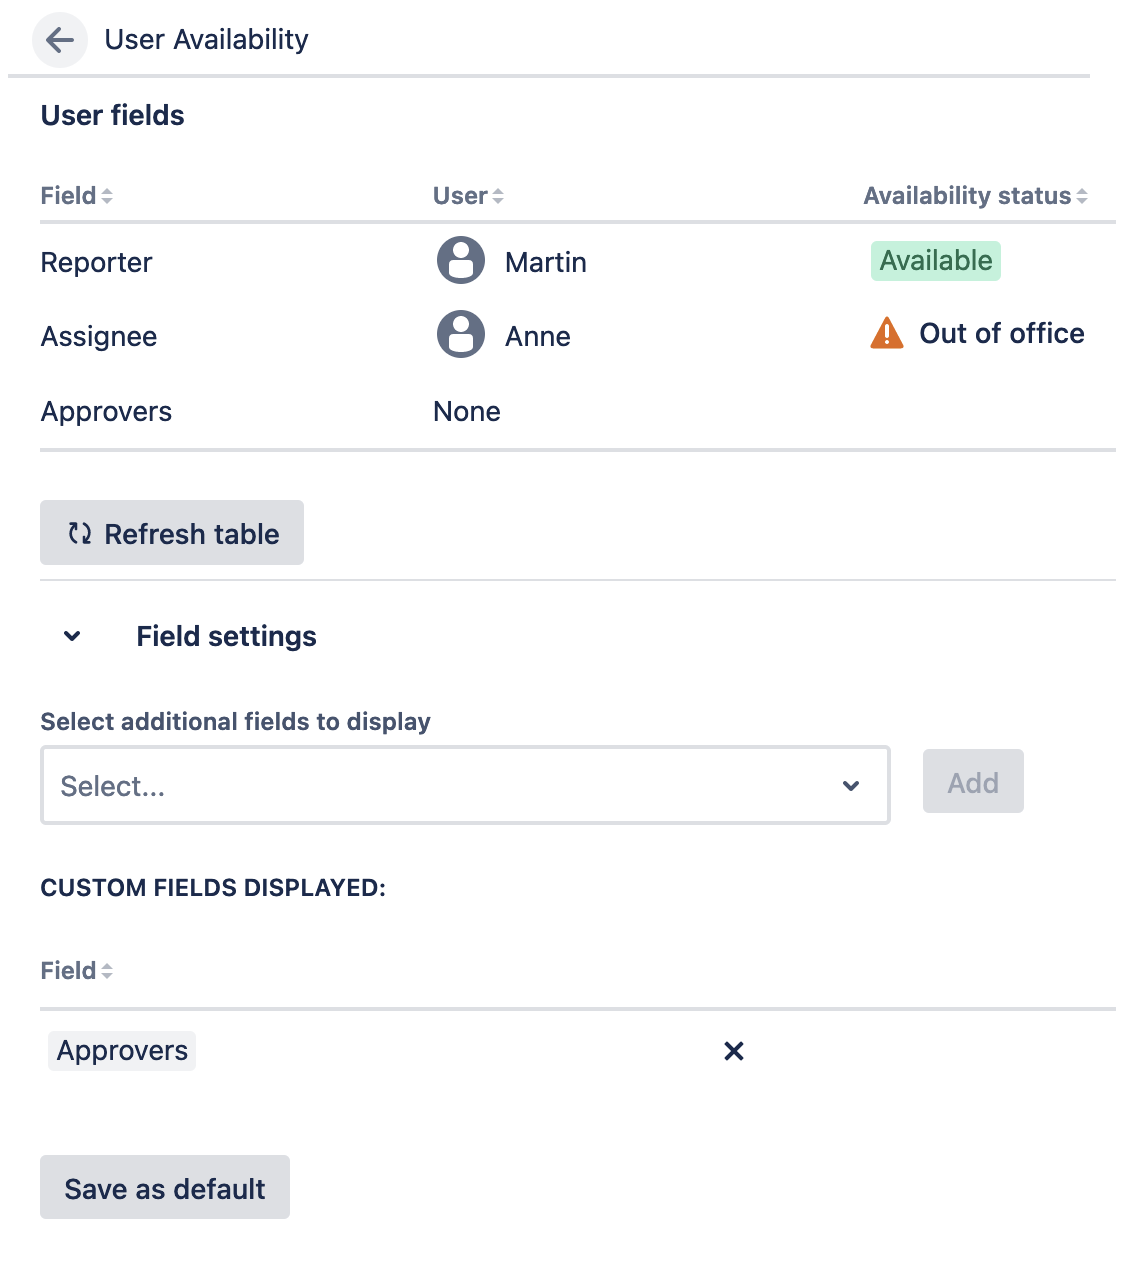
You might be interested in other user fields as well. For instance, if you have a user custom field called owner in your instance, it might be interesting whether the owner of an issue is currently available or not. For that reason, you can add more user fields to the availability overview. To do so, just expand the field settings at the bottom.
You will see a select field where you can add additional fields to be displayed. By selecting a field and clicking on add, the field shows up in the table above and user absence information is loaded for that field.

You can even save those fields as your personal default. Click on “Save as default” and the added user custom field(s) will display every time you open the availability overview.
