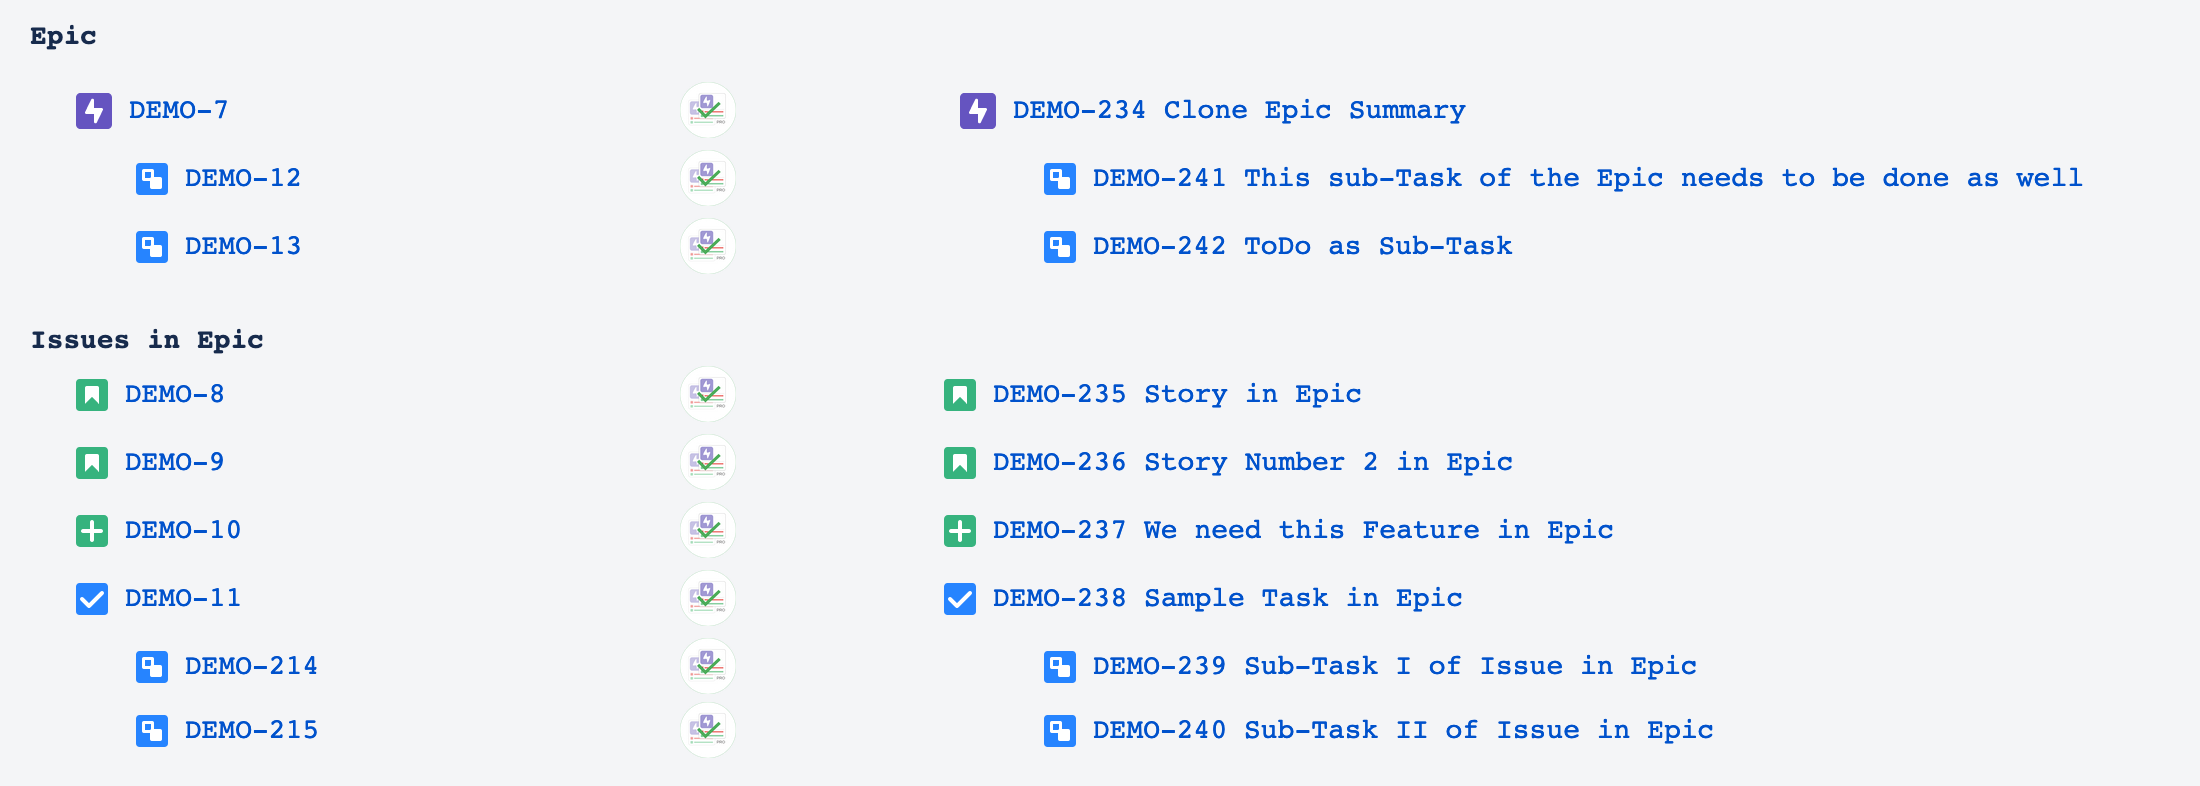
When you clone an epic in Jira using the epic clone feature, a screen will appear that allows you to configure the settings for the cloned epic and its associated issues. This page provides a detailed explanation of the options available to you. For instance, let's consider the scenario where we want to clone this epic using the epic clone option:
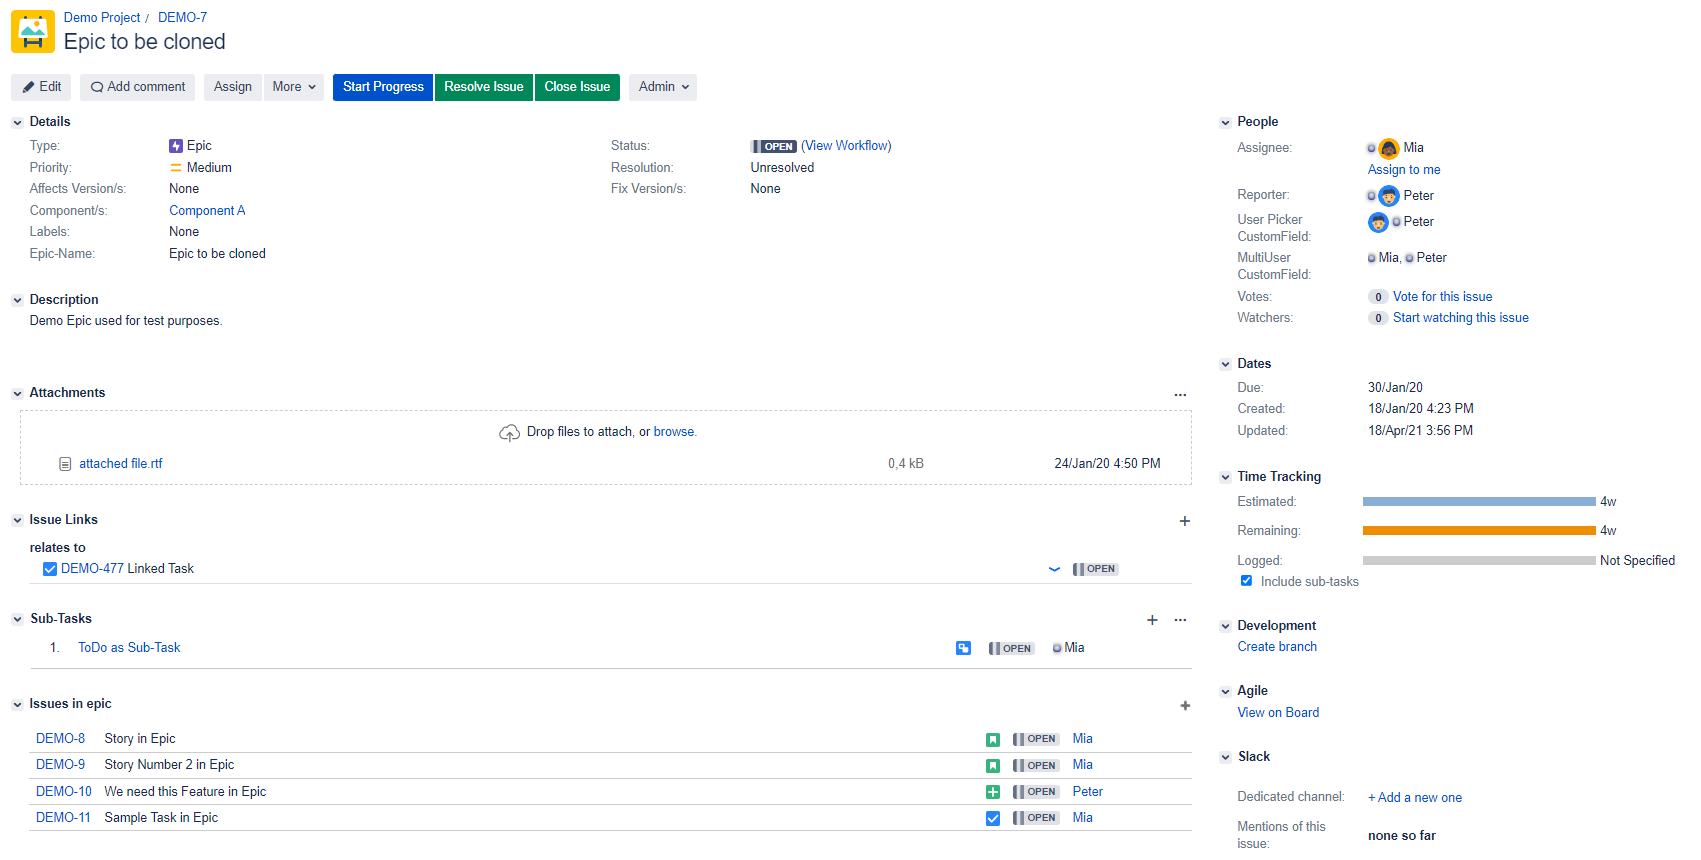
The epic includes four issues, two sub-tasks, one linked issue, one attachment, and a specified value for the original estimate. By selecting More → Clone Epic Template, you will access the epic clone configuration screen, which will be detailed in the following section.
Clone Configuration
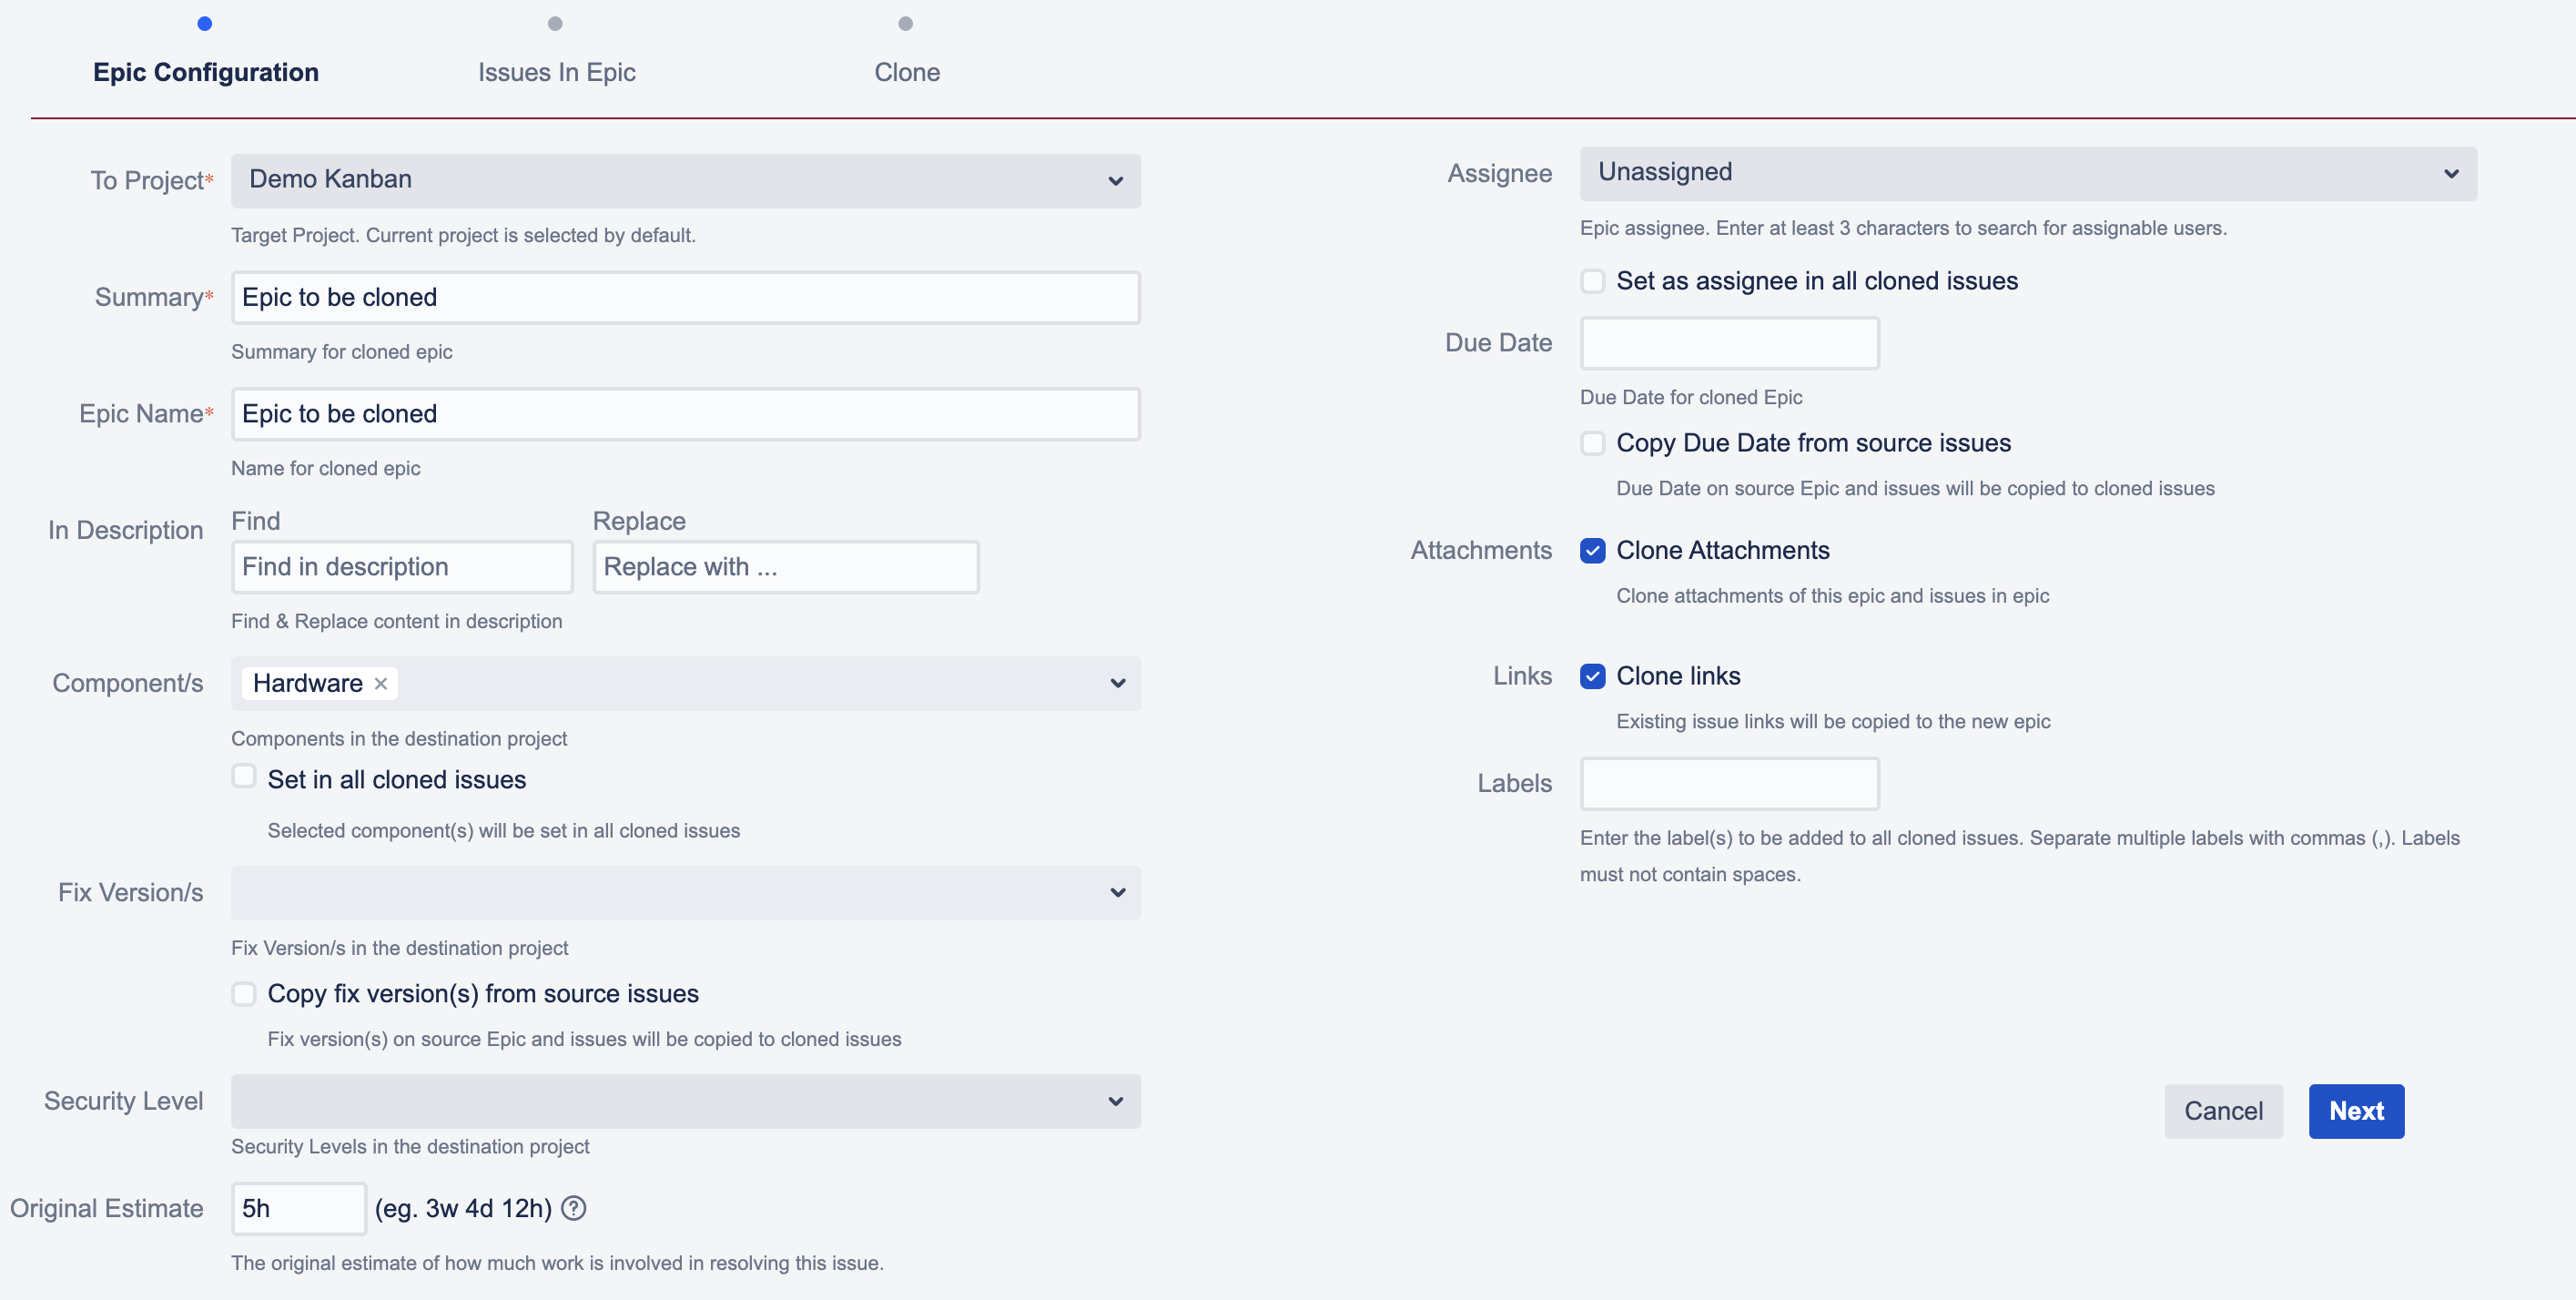
To Project: Choose the target project for your clone. You will only see projects in the selection list that you have access to and that are configured with the epic issue type.
Summary: Set the summary for the cloned epic. The summary of the source epic is displayed by default.
Epic Name: Set the epic name field for the cloned epic. The epic name of the source epic is displayed by default.
In Description: The find & replace functionality for the description field is particularly beneficial when you have placeholders in your source or template epic description. By entering the placeholder in the "find" section and the desired value in the "replace" section, the description in the cloned epic will be updated accordingly.
Component(s): Set the component(s) field in your cloned epic. The field value of the source epic is displayed by default if a component is set. The select list will show all available components in the target project (see project field on top).
Optionally, you can choose to set the selected component(s) in all cloned issues. If this checkbox isn’t checked the components field value will be copied from source to target issues.
Fix Version(s): Set the fix version field in your cloned epic. The fix version value of the source epic is displayed by default if a version is set. Please note that the fix versions you select here will be set also in all issues in epic. The select list will show all available versions in the target project (see project field on top).
Optionally, you can choose to copy set fix versions of all cloned issues.
Security Level: To set the security level for your cloned epic. Please be aware that the chosen security level will also apply to all issues within that epic. The selection list will display all available security levels for the target project (refer to the project field at the top). To configure the issue security during the cloning process, you must possess the appropriate "set issue security" permission in the target project. If you lack this permission, the cloning process will not succeed.
Original Estimate: Set the original estimate for the cloned epic. The estimation value of the source epic is displayed by default if it has a value set.
Assignee: Choose the assignee for the cloned epic. Only users with assignable permissions in the target project are eligible for selection. Please enter at least three characters to search for assignable users within the target project.
Optionally, you can choose to set the selected user as assignee for all cloned issues.
Due Date: Set the due date for the cloned epic.
Optionally, you can choose to copy set due dates of all cloned issues.
Clone Attachments: If you would like to clone the attachments of the epic, please check this option.
Clone Links: To clone the issue links of the epic, please check this option. If selected, the cloned epic will be linked to the same issues as the original epic.
Add Labels: Add one or several labels to the issue. Labels in this field need to be separated by comma (“,”). Spaces can’t be inserted. Existing labels will remain and cloned as well. The additional labels added on the clone screen will be set on all cloned issues if no individual labels are set for child issues on the next page (see below).
Clicking "Next" will take you to the second page, where you can configure the issues within the epic. At this stage, the required fields for the target project will be validated. For instance, if the due date is mandatory, you will not be able to proceed without entering a value in the due date field.
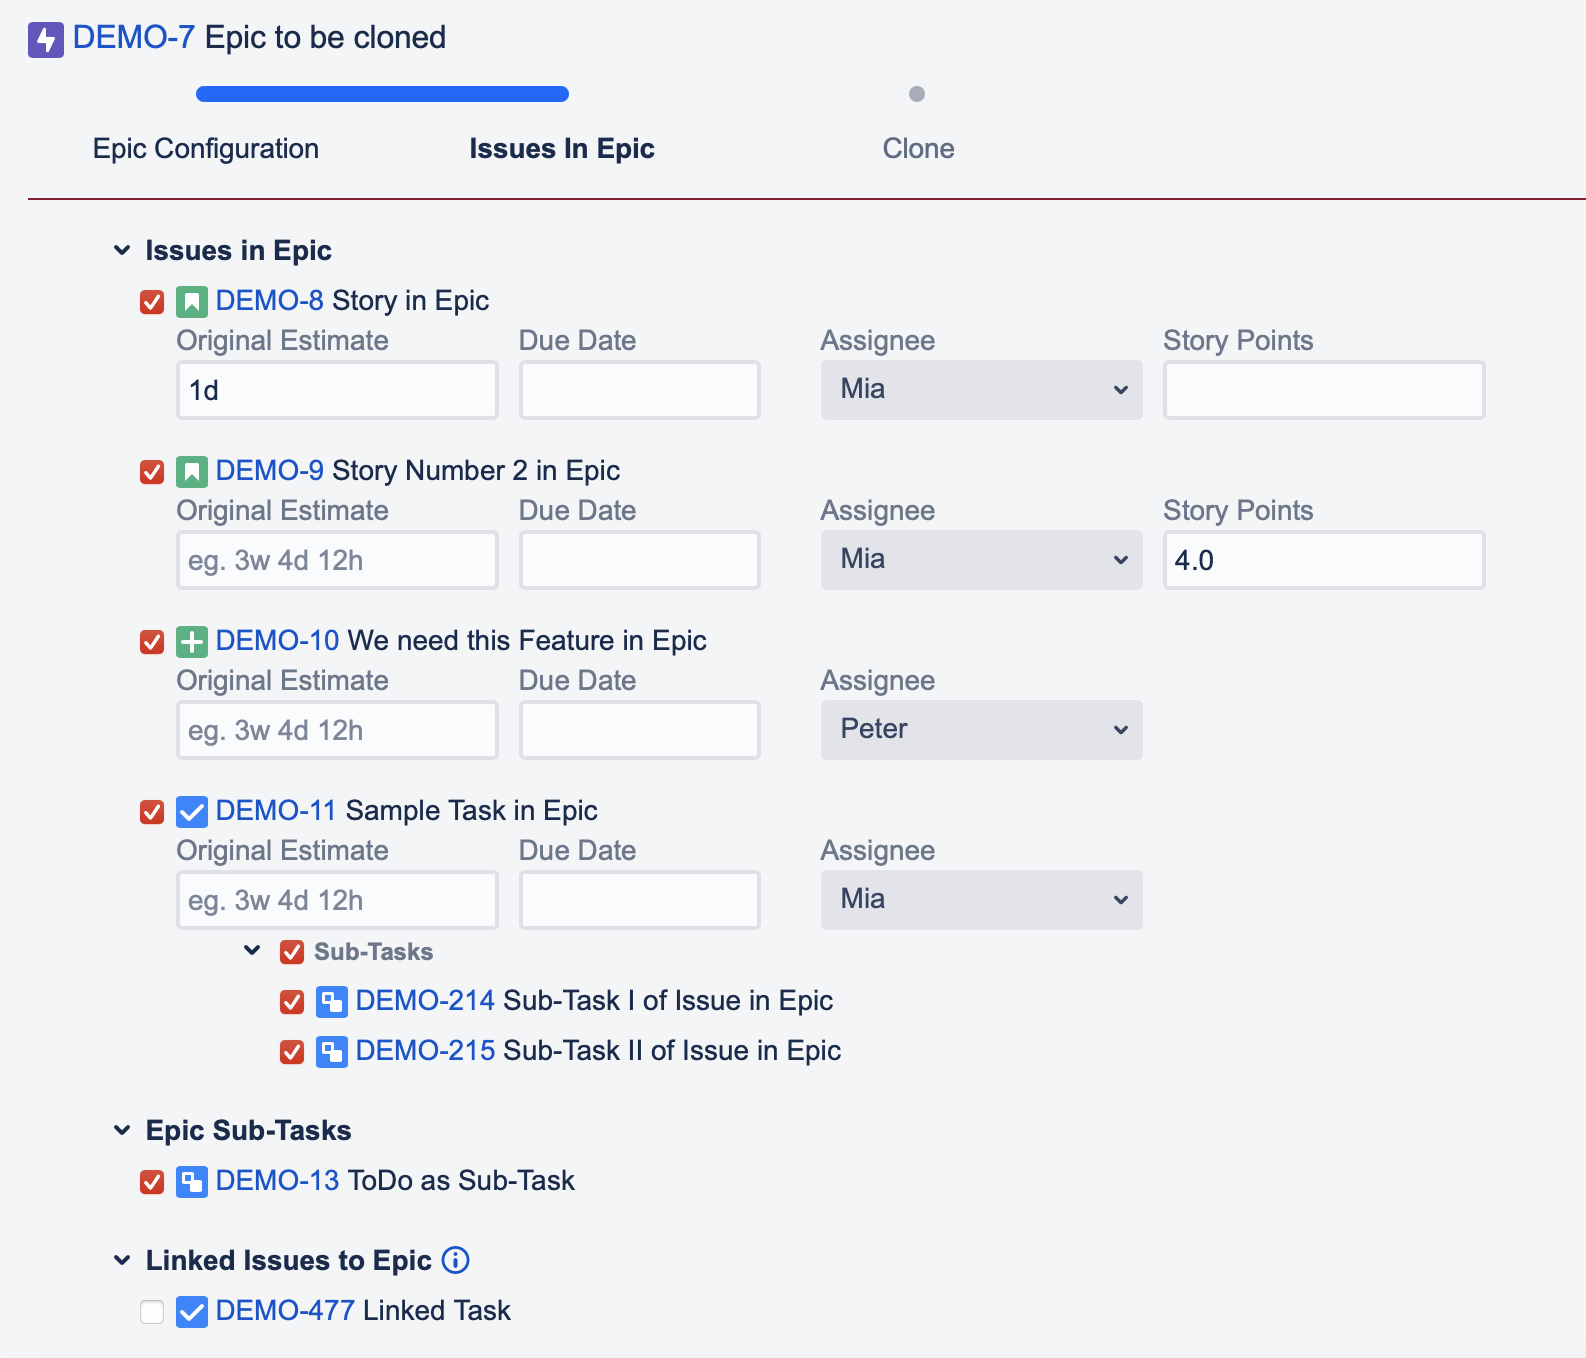
Issues in Epic
This screen displays all issues within the epic, showcasing the issue type icon, key, and summary for each item. You can select which issues to clone by using the checkboxes next to them. Additionally, you have the option to configure some extra information here.
Original Estimate: Set the original estimate for the different issues in epic which will be cloned. The estimation value of the source issue is displayed by default if it has a value set.
Due Date: Set the due date for the different issues in epic which will be cloned.
Assignee: Select the assignee for the different issues in epic which will be cloned. Only users with assignable user permission in target project can be selected here.
If you selected on the previous screen that the epic assignee should be assigned to all issues, you won’t be able to select an assignee for issues in epic here.
Story Points: To set story points for stories within an epic, ensure that this field is only visible for the story issue type. Additionally, the story points custom field must be present in your Jira instance; please note that it will not function correctly if the field has been renamed in your instance.
Sub-Tasks
If the epic includes sub-tasks, they will be listed below the issues in the epic section, complete with the issue type icon, key, and summary. Just like the issues in the epic, you can select whether to clone these sub-tasks using the checkbox. If the checkbox is checked, the sub-tasks will be cloned into the target epic.
Linked Issues
If the epic has any linked issues, they will be presented in a list beneath the sub-tasks section. Additionally, for both the epic and the sub-tasks, you have the option to determine whether the linked issues should be cloned. Please note that if the checkbox is selected, those issues will be cloned, and the cloned issue will be associated with the target epic.
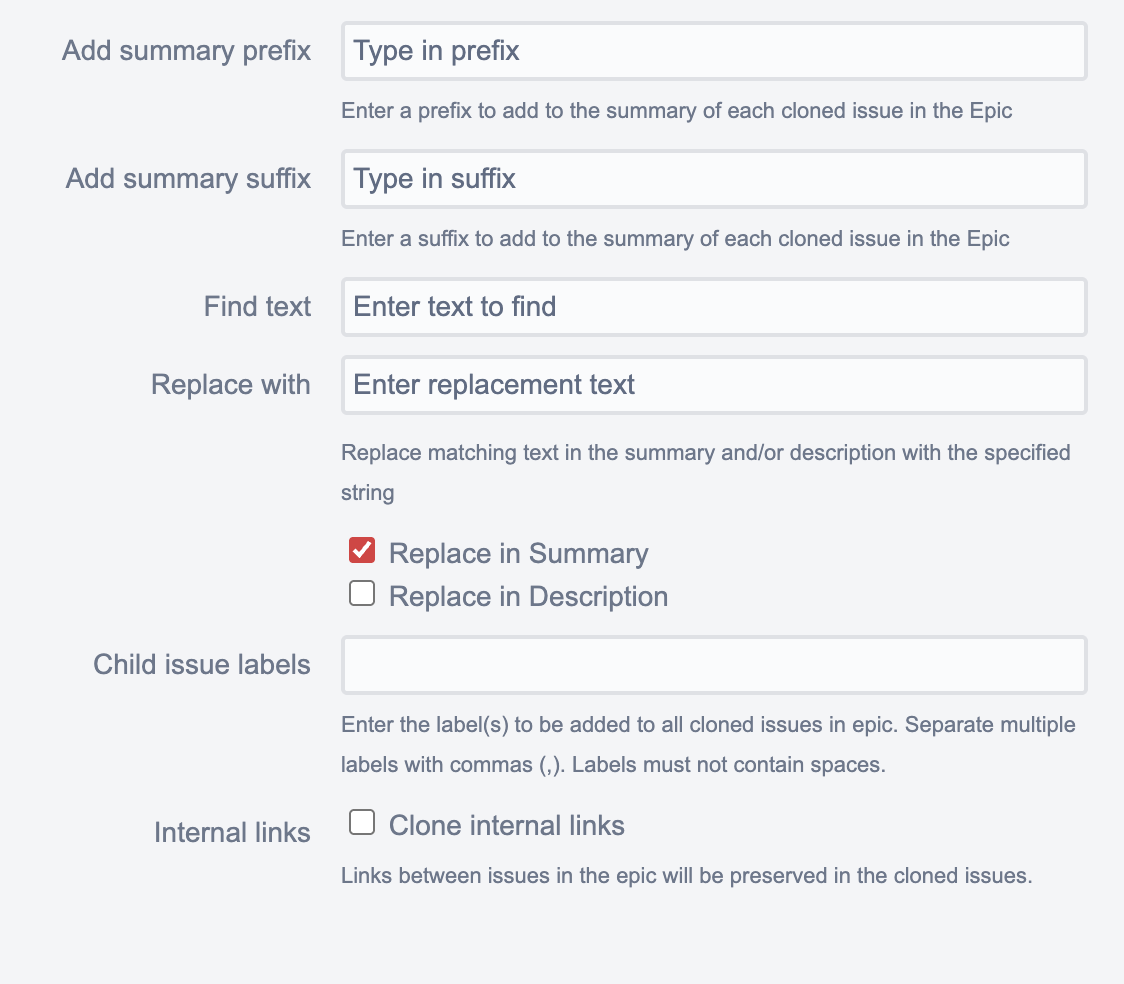
Summary Prefix and Suffix
You have the option to add a prefix or suffix for the summaries of issues in an epic, sub-tasks, or linked issues by filling in the two fields on the right side. Any text you enter will appear as preview immediately before or after the issue summaries displayed on the left side, respectively.
Find and replace
To update the summary, description, or both in all child issues, use the find and replace feature. This functionality is particularly beneficial when you have placeholders in your template issues that you wish to substitute with actual values during the cloning process.
Child issue labels
You can assign distinct labels exclusively to child issues. In this field, labels must be separated by commas (","). Please note that spaces are not permitted. Existing labels will be retained and cloned as well.
Internal links
Decide whether to replicate internal links among child issues. Internal links refer to connections between child issues that belong to the same Epic. If you choose to enable this option, those links will be maintained and established between the corresponding cloned child issues (see Clone Process | External/internal links of child items for more details).
If you finished your settings, just press the "Start Clone" button to start the cloning process.
Please note that regardless if the issues in epic or linked issues are located in different projects or not in the same project than the source epic, all issues will be cloned to the project selected in the "to project" field (= target project).
External/internal links of child items
As the cloning of child issue links can become complex, here is a table with examples for the different possibilities. Let’s assume we have a source Epic with child items A, B and C, and issues D and E, which are outside of the source Epic, so not among the children.
-
Source Epic
-
Child: Item A
-
Child: Item B
-
Child: Item C
-
-
Item D
-
Item E
|
Link |
Type |
Selected link option for child links |
Result |
|---|---|---|---|
|
Item A → Item D |
external |
Clone external links |
Cloned item A → Item D |
|
Clone internal links |
no link created as link is not internal |
||
|
Item B → Item C |
internal |
Clone external links |
Cloned item B → Item C |
|
Clone internal links |
Cloned item B → Cloned item C |
Results
Once the cloning process is complete, the results will be displayed. You can then access the newly created epic or issues by clicking on the corresponding links.